Tuesday, June 11, 2013

Digital Identity


In order to create a digital identity that represented me as an individual, I explored the available tools in search of a creative outlet to show who I am. At first, I created a Google+ account with all my contact information, education, work experience and decided this wasn't stimulating enough. So, I broadened my horizons and stumbled upon Visualize.me. Once I saw the graphic representations I knew it was exactly what I hoped for. Given that I'm obsessed with info-graphics, I quickly explored the themes available. I decided on the Crescendo classic due to its clean and simple nature. Then, it was time to enter my information to construct ME. Within the profile options, I was able to add a summary about myself, work experience, education and links, which are the basics of all profiles. However, this is where the graphic representation of this tool really shines. While entering my skills, interests, languages, and stats, my profile began to take shape and gave it the personal touch I was seeking in a digital identity.  Overall, I'm pleased with the final product and look forward to seeing this tool build as it matures out of BETA.

If I were to give my insight, I would propose to see the links highlighted more. They are currently at the bottom of the page and if size matters, then each were misrepresented in comparison to the rest of the items on the page. They had a nice start to the available avatars to connect with your links, but it would be nice to see Google+ and Diigo added to the options. Once the portfolio section is released, this site will take on a whole new meaning, by allowing individuals to show their work in a meaningful way. I hope it is done in a similar, esthetically pleasing manner that draws the viewer in deeper.


A sneak peek into my visualize.me!


Monday, June 10, 2013

Broadcasting Live

For the means of this activity I decided to sign-up and utilize Ustream to record my first live broadcast. As I was setting up the account and getting my script ready, I began to get a little nervous, thinking of the possibility that people would be watching. I intended to present on something that was pertinent to my masters and could shed some light on what I've been learning and implementing in my classroom. Given it was the day of my classes "End of the Year Celebration," I was happy to speak about some of the ways we use mobile technology in room 18. Today was a special day shared with the families of my students. I invited the whole gang and we started with a performance at noon. Grandmas, grandpas, aunts, uncles, and siblings funneled into the room. We sang three songs, then the iPads and iPhones came out! As homework, each family was encouraged to download a QR scanner which would allow them to watch an assortment of videos posted on the walls of the classroom. After, we went outside and had a picnic on the grass in the shade of the trees on a beautiful summer day in Southern California. Overall, the excitement shared between the families was priceless. It was gratifying to see the smiles and laughs shared as they watched intently, huddled in circles around the room. It was a culminating event of many hours spent preparing, constructing, and editing to reach this point, but it was worth every second. As I sat down to work on this assignment I thought that the best item to share for my live broadcast were some of the tools that made this project possible. 

I began by writing some ideas down in a Google Doc and the next thing I knew I had a page worth of notes, so I used them as a script and added ideas throughout the presentation. One of my biggest challenges was staying short and sweet because when I begin talking about any given tool or app that I'm fired up about the wheels start spinning. Next thing I know I would have talked for who knows how long about who knows what jumping around... "and you could do this! but don't forget to use the export feature... First you should create a shared folder..." As you can tell, I'm deeply invested with these tools as they bring out a true passion of mine. Here is the brainstorm turned multi-paragraph, detailed description on mobile technology.   


Once my script was complete and I felt I had practiced it enough to sound fluid, I was ready to create a Ustream account and record. Setup was simple and with an easy to navigate homescreen including the essential features, I was up and running in no time. Here are the options for recording 


As I neared the moment of truth, I sent a Tweet with a link to my video in case someone was available to watch my introduction to mobile technology broadcast.


End result... Twitter feed with my broadcast. 


Look! I'm LIVE! 


Here is my channel feed! Mobile technology in education...


For those interested in watching the broadcast, you are welcome to watch it on Ustream!
Look for the next installment soon!

In conclusion, this class has opened me up to publicly write and not be afraid to share ideas with an audience. In all of my education leading up to this point, there were no really opportunities to share my experiences with anyone other than my teacher or fellow students when it came to a presentation. I'm glad I've had this opportunity to reflect on my teaching practices in the form of mobile technology and share this broadcast with you. 

Sunday, June 9, 2013

Webinar

Education Week: Webinar - Blended Learning in the Math Classroom


Strengths: Twitter, Ondemand Archive within 24 hours, Ask a question which will be answered in the Q & A at the end and Chat feature.


Weaknesses: none


Education Week is a resource that I currently follow on Twitter. They have ongoing links to educational research and articles that relate to my teaching. Given we use Dreambox in our district and they were the sponsor of this webinar, so material described was pertinent to my classroom. I would certainly participate in a future webinar of this nature! The entirety of the presentation was research based, that incorporated supporting visuals throughout the conversation. Some of the backchannel conversations that occurred in the chat feature allowed other educators to piggyback on the presentation with examples of how they are using these strategies in their classrooms. These real-life examples are profound ways for me to visualize and anticipate how I can integrate blended learning into my classroom.


A webcast would be a great way for students to take ownership of their learning. The access and equity allows students to present their learning to authentic audiences on a larger scale outside of the four walls of the classroom. Teachers can bring in experts in a specific field who can provide enriched learning experiences. Personalization of material and research in a PBL setting would allow more opportunities for this tool to be utilized.


A webcast could be used in the classroom to inform students in a blended learning setting whether it be a station-rotation model, lab-rotation model, flipped-classroom model, or individual rotation model. Each of these opportunities would allow students to view and respond to material that is age appropriate and standards aligned, while other students can receive individualized instruction at their ability level. Given the videos can be viewed later in an on-demand model, students can view content at their own pace and materials can be based on the need of each student. It would also be exciting for students to create webinars as an alternative presentation model in addition to the Keynotes and iMovies we create on a regular basis.

Strange coincidence, but the fact this webinar was on blended learning it provided numerous ideas for using webinars in elementary education as we continue to push more technology into the classroom to support individualized instruction. Based off a short Google search, I was able to find a number of related webinars I would like to attend in the upcoming weeks. It is exciting to know that we as educators can continue to learn in such rich learning environments in a flexible manner for free. It is a powerful time in education for those who are interested in pushing the limitations of limited funding, time and instructional staffing to become more effective in their teaching and increase productivity.

Saturday, June 8, 2013

Twitterthon


Over the last week, I've expanded my Twitter connections with some noteworthy findings. Previously, I used Twitter to follow a handful of Tech leaders and publications, along with the leadership team in my district. It has lead me to many great resources over the course of this school year, which I've used in my classroom, shared with staff members, and incorporated into my Masters and Mobile Technology Certificate. With these free resources at my fingers tips, I feel it has been some of the most meaningful professional development I've received since being in Education. Yes, this may seem bold, but before joining Twitter, the only times I was connecting was at conferences or in district adopted professional development. Now when I attend those events, most of the presenters have a Twitter account so I'm able to follow them and link to the sources they provide. Until about three months ago, I had a personal account which I used as a read only source. Now I have a school account where I often favorite and retweet articles. On this account I had some followers that I picked up along the way, but I decided to start fresh and wipe them clean in preparation for next school year, where I intend to use this account as a means to connect with parents and colleagues. To my knowledge, I'm the only staff member at my school site using Twitter, but there are a number of teachers within the district using it. 


Matt Gomez is a great resource as a Kindergarten teacher pushing technology in his classroom. He promotes #kinderchat once a week and I have found some great write-ups on his blog. 


I prefer to use my iPhone as the vehicle to access my account from bed. I often check it when I first wake up and get ready to sleep in the evenings. 


Look! People want to follow me... ;)


I love Nearpod! I've used it in my class and look forward to using it more in the future. I enjoyed this Snapguide: how to, so I downloaded the app and have been playing around with how I could infuse it into making "how to: guides" with my kids.


I was surprised to have 76 Tweets on this account because it is the newer of my two Twitters.


All about me! 


Here is a snapshot into some of the Tweets I've made this week. I'm a little bit obsessed with Infographics, so you will find plenty of them as RT's on my feed. 

Tuesday, June 4, 2013

Infusing Social Media


Using an already established lesson on characters, setting, and major events in a story, I plan to integrate social networking into the assignment. In this revamped lesson, students will be expected to reenact these pieces to the story as a team. They will need to show an understand of characters, setting and major events. Through the use of an app called Days students will take photos of their team, infuse them into the app, tell about the pictures in sequence of events, and provide a reaction to what happened. When they are complete they will share the lesson on Twitter, so other students and parents can view the material.


Here is the original lesson:


Now let’s take a look at Days as I explain some of the features and how I would integrate Social Media into this lesson as an extension activity.

First, you see the sequence of photos taken using the mobile device with day and timestamps. If you were to click on the pictures you have the option of adding comments. This is where students would add text about their character, setting, and major events from the story. They would be expected to have one picture representing characters, a picture of setting, and three major events from the story (beginning, middle and end). In the upper most corner you see the post feature. As I click on it, you will see the result in the photo below. 


Here I have the option of posting to three various Social Media outlets. I've linked our class Twitter to the app, so that I can share the post. This way not only parents, but other students can easily access the learning as they check their Twitter feed. They are encouraged to comment and give feedback on students work at this time.  


This is how the digital story looks when posted to Twitter. Slide 1...


Slide 2...


Slide 3


In this example, you see how clicking on a picture allows you to comment on the post. This is where students have an authentic opportunity to communicatie and collaborate with their peers. 

Days is a great way for teachers to have students tell digital stories or keep a digital journal about their day. The content can be easily added to Twitter and shared with others. I plan to use this tool during literacy time, plus Today's Meet as a way for students to have backchannel communication. While staying to the 10-2 rule, I can ensure students have an opportunity to collaborate with their peers and synthesize their learning. 

Creating a space for your class to communicate is as easy as this. No need for logins or passwords and the information can be kept for 2 hours or up to a month.

Pose a question and students begin typing their responses. A bonus is you can encourage students to stay within the character limit to be clear and to the point in their writing. 


Wednesday, May 29, 2013

Interview: Mobile Technology


Working with a second grade teacher from my school site I was able to see how she is utilizing mobile technology in her classroom.  It was powerful to see her perspective on how her year is going, along with the successes and challenges. Given the district provided her with a set of six iPads, she wanted to fill the void and be able to obtain as close to a 1:1 environment, as possible. She reached out the community for used iPhones and/or iPod Touches. She was able to wrangle eleven more donated devices and has filled the remaining slots with BYOD of those students who enjoy bringing their device to and from school. At the beginning, when she was trying to go through the proper channels to green light r this program, she was hitting roadblocks from the technology department. She felt they viewed her ambitious effort as more work for them by ensuring all devices were working properly on the network and fixing any glitches. Instead, she decided to take matters into her own hands and run with the program on her own terms. There were no policies in place to stop her from the BYOD model. It was strictly that our district has kept a heavy hand in deciding the direction the program will go. It is exciting to see the accessibility she has had throughout the year and hopes that next year with the addition of more district mobile devices she won’t rely on as many BYOD. I owe her a great deal of respect for blazing trails on her own terms.
Considering she moved from Kindergarten after ten years of work, second grade was a big shift in the beginning, but it has proven to be rewarding. She reflects, “I never thought I would have more parental involvement than in Kindergarten. Parents are in their first year of their child’s education, they are excited and try hard to be involved. However, I had almost two-thirds of my students for the second time and I had established relationships previously in Kindergarten. With the addition of technology, I saw a huge shift in parents relationship with their students and offering feedback to others. It was exciting to see those who were unable to help in the classroom, spend time with us via technology. They were commenting on our blog, contributing to Google Docs, Voicethreads, etc. Each parent took it upon themselves to collaborate with us!! Overall, I had never seen such parental involvement in regards to academics.”

Some of the biggest challenges included: managing the devices, setup, updates due to the assortment of devices, and organization. She stated, “It was new to me just like the kids. We were learning together and they were so excited when they figured something out or helped solve a problem; truly empowering. One of the biggest hurdles are logins for students on a variety of web tools and apps that we use. When creating these accounts it often takes a great deal of time and then we have to make sure that each student has the information for future use. With every professional development opportunity that I attend, I am introduced to unique ideas and projects that I want to implement in my classroom. However, I have to be selective in what I try because it means exponentially more for me and my students. My goal has been to focus on a handful of tools and dig deeper with their functionality.”

What she has learned resonates deeply with me and my experiences with technology. She states, “I have never seen such high levels of engagement and interest in students’ learning! With every unit, I can see substantial growth in their academics, social skills, and it’s maturing them at rates I did not see before technology. It is exciting to see that from such an early age, these kids are learning lifelong skills that will eventually help them in the workplace, which is a huge advantage over kids just a few years ago.”


We are opening doors and opportunities for our students at an alarming rate. It is an exciting time to be in education and share these successes with an amazingly talented colleague. Our conversation inspired me to think outside the box and continue to push myself and my students outside of our comfort zone. Taking risks is often rewarded through the use of technology. Although it can be a large investment of time at the start, you begin to reap the rewards at the end of the school year with the social, academic gains your students make.


Digital Storytelling

Through the use of Comic Book! I was able to use my iPhone 5 to create a Digital Story of my path as an educator. Using some lifestyle photos, I tried to put a fun twist on the story...


In conclusion, it was an exciting journey from third grade with Mrs. B, to where I am today. I'm glad that I stuck with it and all the hard work has truly paid off. I couldn't be any happier and the adventure was a great learning experience. PS Mrs. B just recently retired and I keep in touch with her as my cousin now dates her daughter; small world! 


Wednesday, May 22, 2013

Discover a New Tool


With the help of Kathy Schrock, I was able to find three new web 2.0 tools that I am certain to use in the classroom! Please check out my experiences, the ways I see them used in education and a review of each tool.


1) Smore - “beautiful pages instantly!” Although this site was designed to create digital flyers, it has amazing potential in education! I’m no longer crafting paper newsletters for my class... I intend to create an end of the year newsletter using this tool. Once you make a template or skeleton for your newsletter, all you need to do is change the style or theme for each month's edition to fit the season. I’m excited to add multimedia rich content including: videos, pictures, or tweets. With the added bonus of privacy features, you can quickly add the link to your Wiki, send an email blast or tweet to your class. I’m excited to finish this over the weekend and send it to my families. I intend to use this exclusively next school year in lieu of paper printouts. Our school is placing a heavy emphasis on using less paper and at this point, my newsletters were my only paper communication. This not only adds options to the home to school connection, but supports the environmentally friendly message I try so hard to instill with my kids. As an added bonus you can track analytics by seeing you who views the page, for how long, and if they followed any links placed within the page.
This site is extremely easy to use with the drag and drop feature. I was able to add photos of the kids and I intend to use the gallery feature in future installments. I enjoyed how simple it was and it left me with no challenges thanks to simplicity. I was able to quickly find the privacy settings and ensure the security of class. Please, check out Smore for your next newsletter!


Review:
Functionality: 8/10
Educational value: 9/10
User friendliness: 8/10

2) Google Forms - Create a survey, quiz or exit ticket for your class to easily access. One of the greatest benefits of using Google Forms is there are no log-ins. You can share the link through email or better yet, create a QR code for your class to scan and access. I’ve been hooked on Socrative since it was first introduced and use it as a formative assessment with my students. However, it is often hard to navigate and the workflow for creating quizzes are often time consuming. I enjoy the fact you can control the quiz pace from the teacher device, but this is not a “must-have.” As I am addicted to Google Drive and Docs, I’m surprised I haven’t used Forms. It was not only simple, but gave me all the features I needed to gather data. Once submitted, all of the results are stored in a spreadsheet that can sorted by category for easy access. What a convenient way to store information in an organized fashion. This is a time saver for a teacher looking to use mobile devices formative assessment tools.
Working closely with my principal on next years Site Strategic Plan, I needed feedback from our staff at the next staff. There are many options to poll individuals using the iPads and I show our staff a new tool at every meeting, so I was planning on using TodaysMeet. It is a web tool that allows users to create short 140 character messages in a common thread. However, Google Forms is much more appropriate for this setting. Thanks in part to this assignment I have changed gears and created a simple Google Form that I will email to the staff during o
ur collaboration time within the staff meeting. 


For this activity I was able to quickly navigate the available question types, themes and editing tools to create a Form. I’m excited to see the results on Tuesday morning.


Please check out the Google Form I’ve created.


Review:
Functionality: 8/10
Educational value: 8/10
User friendliness: 8/10


3) WeVideo - Create and edit a video in the cloud! This company's mission was to create an online creative toolbox for children that they could use at home and school. What a brilliant idea! Previously, students were confined to only one computer or tablet to edit video. Now, they can travel from computer to tablet and back to computer (endlessly) while editing the same content. With the shared successes of this tool and the integration of WeVideo on Google Drive this is certain to be a hit in education; free of charge! The service is easy to navigate while you seamlessly integrate audio, video, graphics and pictures into a multimedia presentation. With the push for cloud based tools, I wonder how long before WeVideo has some competition?
The tool was a breeze to use and I’m excited to share the final product with some of my climbing friends. Instead of editing this video using iMovie like I had intended, I decided to give WeVideo a go. It shared many of the positive features I enjoy with iMovie. It is simple, with the bare essentials of editing tools. I can imagine classrooms adopting this tool, so they can shoot video on a mobile device, upload it to the cloud, then edit it from home, computer lab, and classroom. They may now collaborate on the same final product. Great idea brought to reality! I’m a firm believer in the statement, “if you dream it, you can build it.” WeVideo is just that!
While using WeVideo I did experience some problems with the transitions feature, so I went through the process of emailing the developer the errors I was receiving. I went ahead and gave them them my browser usage, intended workflow and suggestions to help make the tool more desirable.

In an attempt to use the tool and edit some video, I used climbing footage from last weekend. Here you will see me bouldering on Mt. San Jacinto in Southern California.

https://vimeo.com/66792967


Review:
Functionality: 7/10 - some bugs need to be fixed
Educational value: 9/10

User friendliness: 7/10 - I would prefer to use iMovie
   

Monday, May 20, 2013

Fill Your Toolbox

URL shortening:

URL shortening has many benefits for creating links for staff, parents and students. It keeps the link precise and easy to manage. Whenever possible, I create hyperlinks within my communication, but in all other circumstances, I create shortened links. For those who use Twitter, they know the importance of shortened URL due to the limited characters available. One hurdle I've noticed is when using a mobile device, I find it difficult to create shortened URL. I recently searched the app store for a tool, but I couldn't find one.

Tinyurl.com

  • Wilkes Blog

http://tinyurl.com/nmmawe5

This is my first time blogging and I find it as a useful way of submitting assignments. In my previous extended learning opportunities, the assignments, research and hard work is submitted and forgotten about. My blog(s) are accessible and 


  • School Website

http://tinyurl.com/kdnb23o

Information on my school website stays stagnant throughout the year. Updated information is housed on the class wiki where I can have password protected access due to privacy concerns. This year, we went from using iWeb generated websites to Schoolwires. Over the summer we had trainings to show us the available tools and I created my classroom site and the grade level team webpage.  


QR Codes
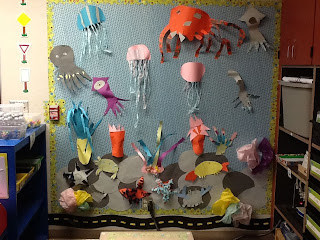
  • In my room, we just finished studying marine invertebrates. I divided the kids into pairs or triads to research: octopus, crabs, coral, jellyfish, and squid. Together with their group we created iMovies, which I uploaded to Dropbox. With the links, I created individual QR codes that we added to the animals in “QR Reef."


    • QR codes are a great way to have students access materials in an independent center in the primary classroom. I wish there was someway I could avoid printing as much paper though. It is the secret passageway for students to access the content their teacher wants them to review.
  • An example video of an iMovie my students created.  


  • Introducing QR Code Reef! I had so much fun working on this project with my friends. My team has now taken on the endeavor and plans to recreate the project in their classrooms. Parents will access the iMovies at our End of the Year Celebration, along with other iMovies we are creating. Thank you to whomever created the QR Code!


Bookmarklets:

Printliminator
Only print out the parts of a web page you actually want. There are many times that I pull pictures from the internet to use with interactive whiteboard apps like Stage and Educreations. However, there are advertisements on these pages that are inappropriate. This tool allows me to quickly and easily remove unwanted content. More efficient than screenshotting and keeps the original theme of the page. Students benefit from printliminator because the content is focused and to the objective. I know that my little ones need content managed as clearly as possible. Students could use this effective tool for synthesizing research and material from the internet. Any opportunities they have to simplify resources the more they appear to retain.

Keepvid
Download YouTube videos to your computer for safekeeping. I have playlists that I’ve created on Youtube for counting, alphabet songs and sight word practice that we use in the beginning of the year. One of the biggest hurdles with Youtube is we have to login to bypass the filter and navigate the material. This tool has many benefits to my classroom and is an efficient workflow. In an environment where students have 1:1 mobile devices, I would be excited to take the saved videos download them Dropbox or GoogleDrive, so kids could access the material directly versus a link to Youtube.


Sunday, May 19, 2013

Dig Deeper into the Mainstays of Web 2.0 Tools


For the purpose of seeing what Web 2.0 tools are available for social, creative, and curation purposes, I have reviewed the following services:

  • Social
    • Edmodo
  • Creative
    • Voicethread
  • Curation
    • Scoop.It

Edmodo is the best available web 2.0 tool in the social category. The possibilities it harvests are continually growing and progressing as more educators give feedback, while providing insightful ideas for the future. Edmodo allows levels of engagement that were not possible before web 2.0 tools. It is designed to get students intrigued about their learning and open the learning outside of the classroom. Teachers can continue discussions online, check for understanding through quizzes and polls, plus award badges as positive reinforcement. Teachers can connect with students, administrators, parents and publishers. Edmodo is a great way to check student progress through a cloud-based setting accessible from any computer. Educators can evaluate students’ understanding through a variety of mediums, garnishing a holistic view of their learning. With the addition of personalized apps, teachers and their students can tailor the learning to meet individuals needs. Edmodo is a powerful social tool that allows teachers to collaborate and communicate through an avenue that is simple and effective. Flipping the classroom has never been so easy with Edmodo.
Educators are using this tool to:
1) Create a paperless classroom
2) Fascilitate online discussions
3) Manage quizzes and polls
4) Flip the classroom by posting Educreations videos for students to watch at home
5) Pen Pal Projects
6) Digital portfolios

Voicethread is one of the best creative web 2.0 tools available. It is a web-based application that be accessed from any computer or mobile device with no software needed. It allows individuals to collaborate, communicate and connect. You may upload, share and discuss images, and audio and video files. Even better, you can integrate documents, presentations and opportunities for higher level, critical thinking. Amazingly, over 50 various media types may be imbedded into a Voicethread. When providing feedback, one may choose from microphone, webcam, text, phone and audio-file upload. Given the diverse options for commenting, peers and teachers can integrate various means for observation. Sharing can be done with your class, school, or open it for the entire world to see. Voicethread is an exceptional tool when considering your next Project Based Learning Unit.  
Educators are using this to:
1) Construct digital-storytelling content
2) Create an advertisement
3) Book review or report
4) Reading analysis
5) Poetry and Illustrations

Scoop.it is the one of the best social media curation tools for education. Teachers can use it to build a powerful PLN for their classroom, share and bookmark content using social media. Later, they may receive feedback and/or likes from followers. Scoop.it is the answer to content curation in any classroom. Among the numerous options available in this category, Scoop.it has an easy to use platform that works nicely to share the learning in the classroom; outside of school.
Some of the best uses for this tool are:
1) Create group activities
2) Organize new content in a digital format for flipped lessons
3) Collect and share educational readings
4) Guide students in accessing rich content
5) Monitor online research of your students
6) Critique information and have students curate social media tools
7) Encourage content creation by students
8) Foster discussions with feedback